Wet sanding, often referred to as “sandpaper wet,” is a crucial technique in the world of automotive refinishing, woodworking, and DIY home projects. It involves using sandpaper or abrasive materials in combination with water to achieve a smooth and polished finish on various surfaces. Whether you’re a professional craftsman or a DIY enthusiast, understanding the ins and outs of wet sanding can make a world of difference in the quality of your projects.
In this comprehensive guide, we’ll dive deep into the art of wet sanding, exploring its benefits, techniques, and the types of projects where it shines. We’ll also discuss some essential tips and tricks to ensure your wet sanding endeavors yield remarkable results. So, let’s get started on your journey to mastering the art of sandpaper wet.
Benefits of Wet Sanding
Wet sanding offers several advantages over traditional dry sanding techniques. Understanding these benefits is crucial to appreciating why it’s an essential skill for any DIY enthusiast or professional.
Smooth Finish: One of the primary benefits of wet sanding is its ability to deliver a smoother finish compared to dry sanding. The water acts as a lubricant, reducing friction and preventing the sandpaper from clogging, resulting in a more even and refined surface.
Dust Control: Dry sanding generates a significant amount of dust that can be harmful to your health and can also settle on your workpiece, causing imperfections. Wet sanding, on the other hand, keeps dust to a minimum, creating a cleaner and healthier workspace.
Extended Sandpaper Lifespan: Wet sanding prolongs the life of your sandpaper. The water helps prevent the abrasive particles from breaking down prematurely, allowing you to use the same piece of sandpaper for more extended periods.
Better Visibility: The water used in wet sanding keeps the surface wet, making imperfections more visible. This allows for more precise corrections and finer detailing on your projects.
Tools and Materials Needed
Before diving into wet sanding, it’s essential to gather the necessary tools and materials to ensure a smooth and efficient process. Here’s a list of what you’ll need:
Materials:
- Sandpaper: Wet/dry sandpaper, available in various grits (from coarse to fine).
- Clean water: For wetting the sandpaper and keeping the surface wet.
- A sanding block: To hold the sandpaper securely and maintain an even pressure.
- Soap or a surfactant: Used in the water to improve lubrication and reduce surface tension.
Tools:
- Safety goggles: To protect your eyes from debris and splashes.
- Respirator or dust mask: To protect your lungs from dust and potential chemical exposure.
- Gloves: To keep your hands clean and safe from chemicals.
- A well-ventilated workspace: To disperse any fumes and ensure your safety.
How to Wet Sand: Step-by-Step Guide
Wet sanding may seem intimidating at first, but with the right techniques and a bit of practice, you can achieve professional-quality results. Here’s a step-by-step guide to get you started:
Step 1: Preparation
- Ensure your workspace is well-ventilated.
- Put on safety gear, including goggles, a dust mask, and gloves.
- Select the appropriate grit of wet/dry sandpaper for your project.
- Cut or tear the sandpaper into manageable-sized pieces.
- Fill a container with clean water and add a few drops of soap or a surfactant. This will create a lubricating solution for wet sanding.
Step 2: Wet the Sandpaper
- Dip the sandpaper into the water and let it soak for a few minutes. This softens the paper and makes it more pliable.
- Keep the sandpaper and the surface you’re sanding wet throughout the process. This prevents clogging and ensures a smoother finish.
Step 3: Begin Sanding
- Hold the sandpaper securely against a sanding block for even pressure distribution.
- Sand in a back-and-forth or circular motion, depending on your project and personal preference.
- Apply gentle, consistent pressure. Avoid pressing too hard, as it may damage the surface.
Step 4: Monitor Progress
- Periodically wipe away the slurry (mixture of water and sanding residue) to assess your progress.
- Continue sanding until you achieve the desired level of smoothness or remove imperfections.
Step 5: Clean and Dry
- Once you’re satisfied with the result, rinse the surface thoroughly with clean water to remove any remaining residue.
- Dry the surface with a clean, lint-free cloth.
Sandpaper Wet Sanding Techniques for Different Surfaces
Wet sanding can be used on various surfaces, each requiring slightly different techniques. Here are some common surfaces and their corresponding wet sanding techniques:
Wood: When wet sanding wood, it’s essential to sand with the grain to avoid creating scratches. Start with a coarser grit and work your way up to finer grits for a smooth finish.
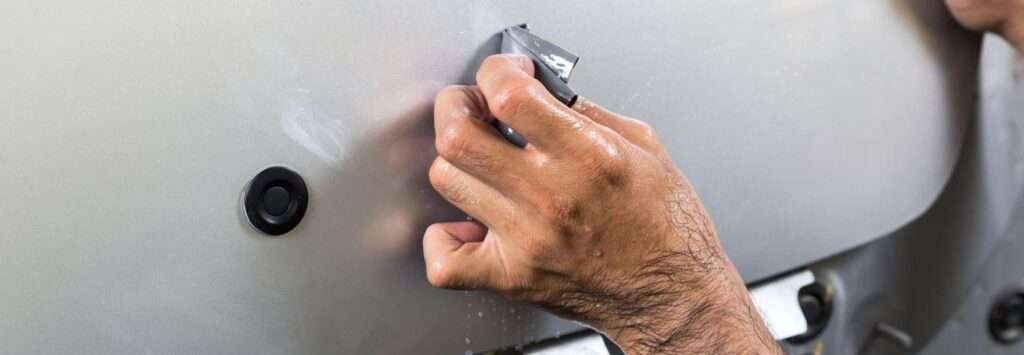
Automotive Paint: Wet sanding is often used in automotive refinishing to remove imperfections and achieve a glossy finish. Begin with a coarse grit to remove defects, then gradually move to finer grits for polishing.
Drywall: Wet sanding drywall can help achieve a smooth surface for painting. Start with a medium grit to remove imperfections, and finish with a fine grit for a polished look.
Metal: When wet sanding metal, use a lubricant specifically designed for metalworking to prevent rusting. Start with a coarse grit to remove rust or imperfections, and progress to finer grits for a shiny finish.
Plastic: Wet sanding is useful for restoring the appearance of plastic surfaces. Start with a medium grit to remove scratches and finish with a fine grit for a polished look.
Tips and Tricks for Successful Wet Sanding
Mastering wet sanding takes practice, but these tips and tricks will help you achieve the best results:
- Choose the right grit: Start with a coarser grit to address imperfections and progressively move to finer grits for a smooth finish.
- Maintain a wet surface: Always keep the sandpaper and the surface wet to prevent clogging and achieve a smoother finish.
- Use a sanding block: A sanding block helps distribute pressure evenly, reducing the risk of creating uneven spots.
- Inspect your work: Frequently wipe away the slurry to check your progress and make necessary adjustments.
- Take breaks: Wet sanding can be physically demanding. Take breaks to rest your hands and maintain precision.
- Practice on a scrap piece: If you’re new to wet sanding, practice on a scrap piece before working on your project to get a feel for the technique.
Safety Precautions
Safety is paramount when it comes to wet sanding. Follow these precautions to protect yourself and ensure a safe working environment:
- Always wear safety goggles, a respirator or dust mask, and gloves to protect yourself from debris, dust, and chemical exposure.
- Work in a well-ventilated area or wear a respirator to avoid inhaling potentially harmful fumes.
- Be cautious when using water and electrical tools. Ensure that all electrical connections are dry and secure.
- Dispose of used sandpaper and any waste materials properly, following local regulations.
- Avoid working with toxic or hazardous materials without the proper protective gear and training.
Conclusion
Mastering the art of wet sanding, often referred to as “sandpaper wet,” is a valuable skill that can elevate the quality of your DIY projects and professional work. With the right tools, materials, and techniques, you can achieve smooth and polished surfaces across a variety of materials. Remember to prioritize safety and follow best practices to ensure successful results in all your wet sanding endeavors. Whether you’re restoring a classic car, refinishing furniture, or simply enhancing the appearance of surfaces around your home, wet sanding is a versatile technique that deserves a place in your toolkit. Happy sanding!
For more tips and recommendations on DIY projects and tools, be sure to visit Afruxy.com – your go-to resource for all things DIY and home improvement.

